Many cyclists are sceptical about the benefits of professional bike fits. First of all, it’s tough to fork out another few hundred dollars after having already spent thousands on a new bike and supporting accessories. Secondly, bike fits are sometimes seen as a bit of a pseudoscience, designed to up-sell you a new pair of cleats or a different saddle.
Although this may be true in some cases, it should not undermine the importance of a good bike fitting. In my opinion, there are three compelling reasons why you should get a professional fitting:
1. You’ll be able to generate more power through your pedal stroke.
2. It may mitigate injury and time off the bike.
3. A comfortable bike will be ridden more.
Riding with comfort, less injury and more power will change your cycling forever. However, with a multitude of different fitting methodologies offered by bike shops, physios and bike fitting specialists it quickly becomes difficult to choose where to go.
My recommendation is to (1) find a bike fitting methodology that is proven and well-tested and (2) find a provider who is trusted and passionate about what they do. Do your internet research, look for reviews online and ask friends about their experiences before settling on a methodology and provider. The two go hand in hand, as the right fitting methodology will be useless if applied incorrectly and vice versa.
My own experience
After doing my own research, to ensure that the bike fit I selected would meet these two criteria, I recently decided on the Specialized Body Geometry Fit. Luckily my local shop, Hampton Cycles, is a Specialized retailer and they offer this advanced fitting method. To be honest, I did initially walk into Hampton Cycles with a bit of a cynical attitude. I’ve had bike fittings before, and despite never feeling truly at one with the bike, I thought my current set up was as good as it gets. I’ve spent thousands in the past, being fitted by highly regarded experts, would this be just another fit?
That’s why I thought I would start with the lower level offering called the Body Geometry Sizing. The Body Geometry Sizing is a 6-point light version of the 18-point full Body Geometry Fit.
The Body Geometry Sizing method is ideal for cyclists who’ve had fittings in the past and who either want to make minor adjustments to their current position or ensure a new bike purchase is set up for success.
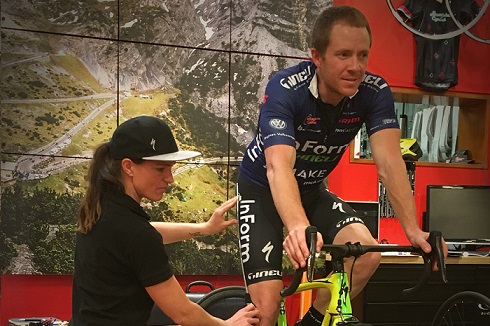
The fitting was conducted by former professional road cyclist Emma Mackie who quickly made me change my attitude towards my need for another fitting. I walked into the shop thinking that I would only need some small tweaks, but as Emma emphasized, one small adjustment can affect every other part of your position. Irrespective of the change, everything must be done with precision.
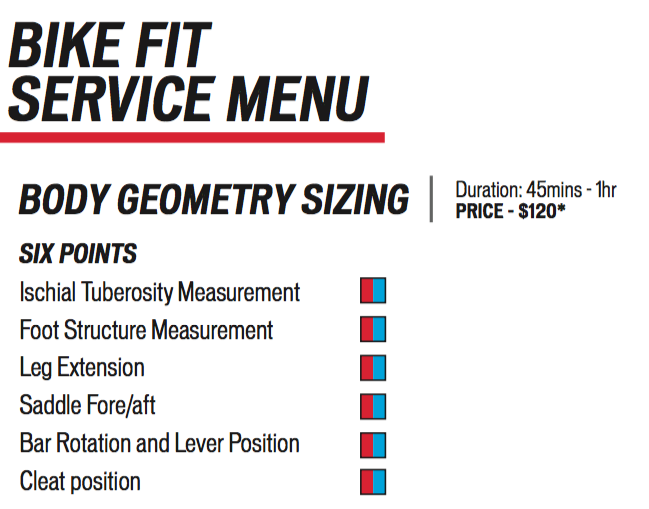
Emma went through the six steps using static measuring tools but validated her measurements using a video analysis tool called Bike Fast Fit. Once adjustments have been made, this application ensures the rider’s position is in line with scientifically validated practices.
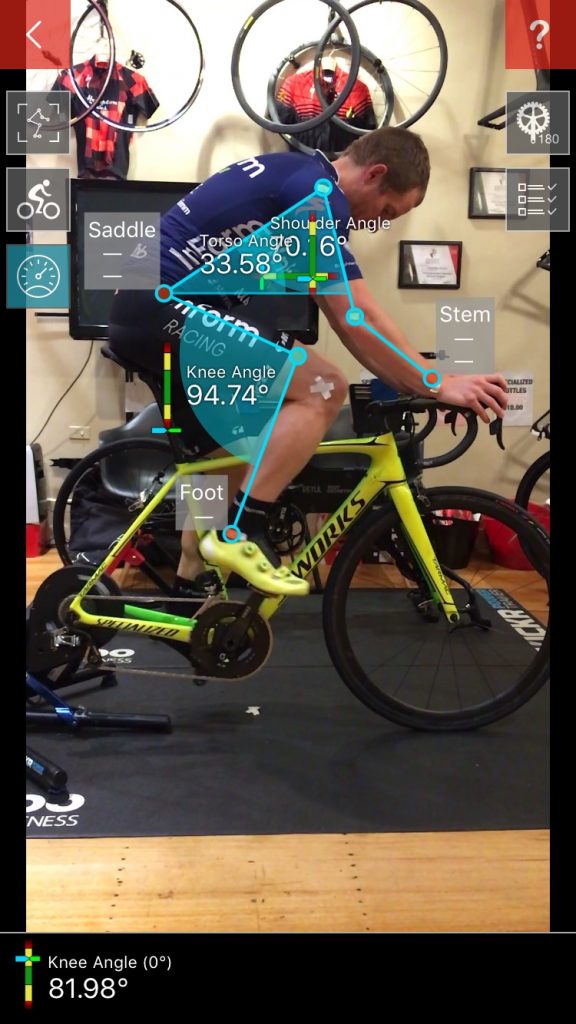
I was impressed with the level of detail and the thorough explanations I received throughout the fitting. The images below show how I was given a detailed explanation of the saddle fore-aft position and the importance of getting this right.
Many cyclists experience tingling or numbness in their toes and fingers when riding. While some treat it as the norm, it’s actually a sign that you’re sitting on the wrong saddle. That type of discomfort isn’t just enough to put you off longer rides, it’s also affecting the power output you generate in your pedal stroke. The bottom image shows the padded object used to measure your sit bone length, which will ultimately determine the best saddle for you.
After the 6-point fitting I jumped on the bike while Emma sat back in her stool and watched me ride. She quickly pointed to my left leg pedal stroke. There was a lot of movement happening in this leg during each stroke, and to Emma, that’s an alarming signal. I explained that it’s been like that forever and it’s just part of my natural movement. Emma politely nodded her head and continued her assessment.
As she stepped behind the bike she immediately noticed that I wasn’t sitting in the middle of the seat as I pedal, but rather ten to fifteen millimetres to the left. Once again, I thought I had the answer: “I used to row bow side at school for many years, that’s why I sit like this”. Emma took a video of my seat position. See below:
As I realised that Emma might be on to something I started sharing some other issues with her, like how sometimes my left knee hits the frame as I’m pedalling, but the right knee never gets close. Or that I’ve never really been comfortable on any seat despite the sit bone width being accurate.
The full fit
I started to challenge my own assumptions about my riding style. Had my rowing during my younger years really caused my unusual pedal stroke, or could it be something else? Emma explained other possible causes, like a discrepancy in leg length or hip or feet positioning.
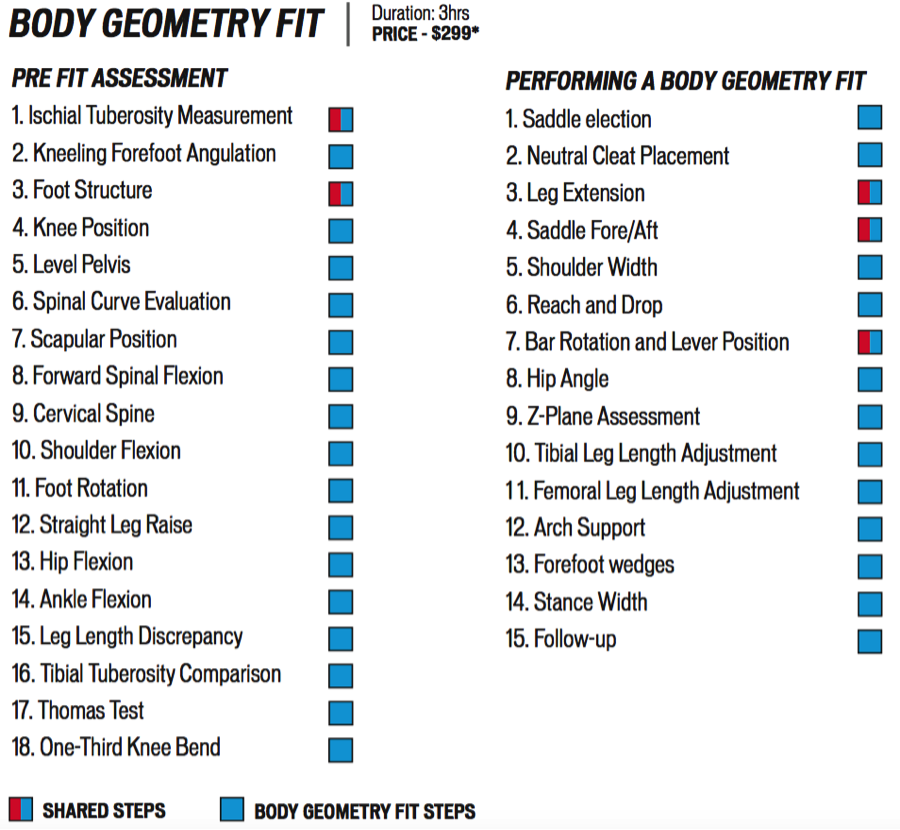
The only way to truly understand the root cause of these issues is to do the full Specialized Body Geometry Fit. I hadn’t intended to do the full fit, as I had a hard time justifying the three hours and $300 it would cost me, but I then realised it was the only way I would get to the root cause of my inefficiencies. I booked a follow-up appointment for a full fitting right then and there.
After seven years of riding, I’m finally going to go all out and spend the time and money on a full Body Geometry Fit. I’m really excited to find out what’s causing my pedal stroke and positioning issues and to see how it will improve my comfort and output on the bike. I think I’ll be struck with a mixture of emotions – a blend of delight and frustration. I’ll be delighted that I’m feeling better and stronger on the bike but frustrated that I could have done this a long time ago and saved myself thousands of dollars on bike fittings and hours and hours of discomfort.
Stay tuned for part two of this article to find out how my full fitting goes.
Leave a Reply
![]()
![]()
![]()
![]()
Comments